Dancing Rain

My Life Inspired by My Loves

DIY Sparkler for New Year’s Celebration

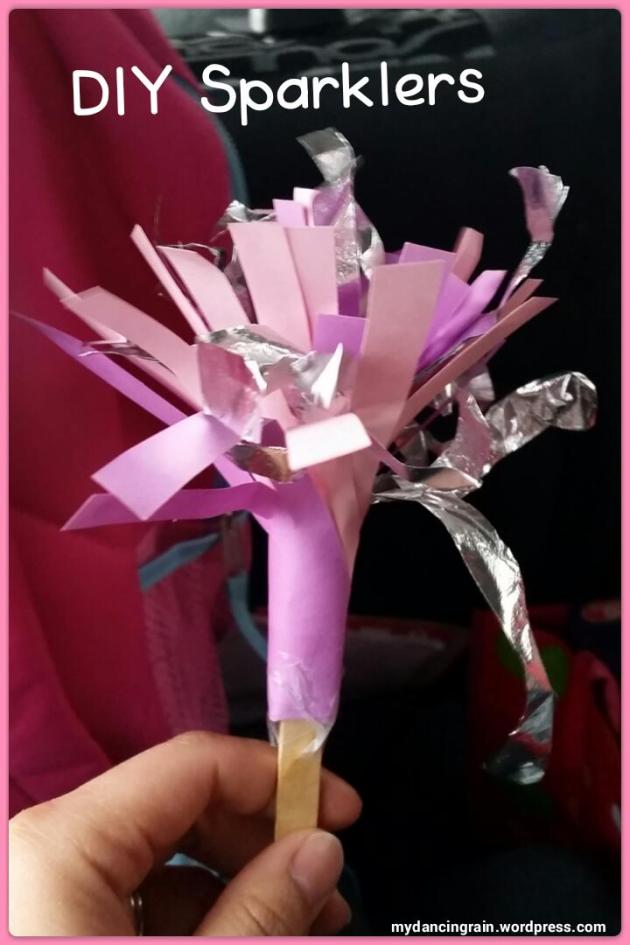
My daughter goes to the best daycare. Just picked her up today and she made a fun sparkler for their New Year’s celebration. It is so clever and seems simple to make, plus she won’t put it down, so I had to share it!

image

Cut two long strips of different colored paper and fringe cut them. Cut a long strip of foil and fringe cut it also. Then twist the strips around a popsicle stick and tape to the stick. Spread out the paper to create a pretty little sparkler! Happy new year!

Leave a comment »

Winter Kids Craft Using Upcycled Bottles and Cans

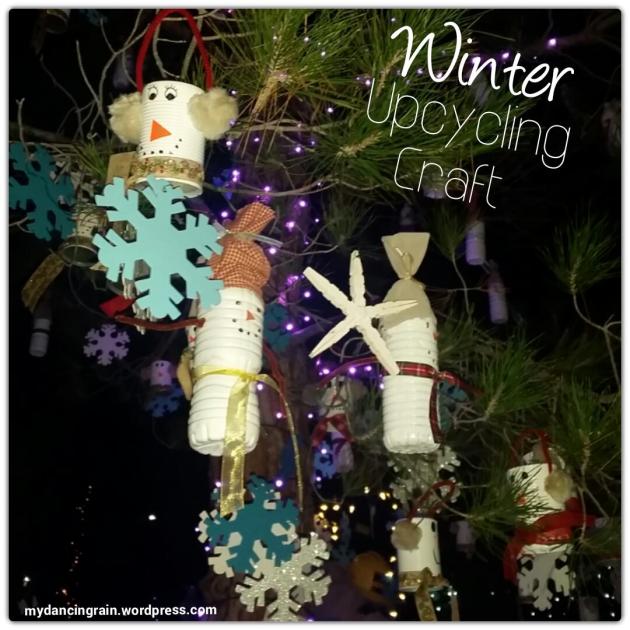
I saw this idea floating on Pinterest this season, and so I was pleasantly surprised to see our local community light display organizers had made these cute snowmen for their winterscape light display. And they hung them from tree branches – a great touch. These DIY snowmen made such a cute display.

image

They used plastic bottles and aluminum cans. I’m sure a small collection could be saved in no time at all. They painted them white and added the face with permanent marker.

The plastic bottle snowmen got little snow hats made of fabric scraps while the can snowmen got ear muffs made of puff balls and pipe cleaners. A colorful, festive ribbon made a perfect scarf for the snowmen.

So cute and a clever way to reuse empty cans and bottles. And it seems easy to do. This craft is definitely on my list for next year when my kid is a little older!

Leave a comment »

Two Special Christmas Gifts

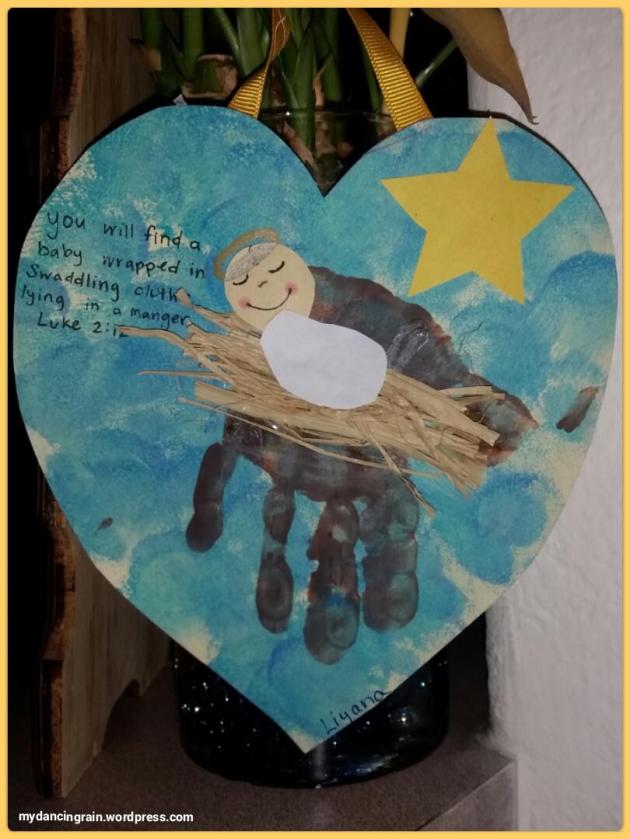
The gift of Jesus and this adorable DIY card my daughter made showcasing that special night long ago are two of the best gifts!

Being a fan of handprint art, I had seen this art idea floating around Pinterest. I love it and am so glad that the awesome teachers at my daughter’s daycare took the time and care to help the kids make these as gifts for the parents!

image

To make this, they started with having the kids paint the night sky on heart-shaped paper using cotton balls and light blue paint. The child’s brown handprint formed the manger. Then raffia was added to make the bed and paper cutouts were used to make baby Jesus and the big bright star. It looks as though the teachers drew the halo with a gold paint marker. They finished the card with this bible verse:

You will find a baby wrapped in swaddling cloths lying in a manger. Luke 2:12

Like I said, two very special gifts. ♡ Merry Christmas! ♡

1 Comment »

Wrap Your Gifts in a DIY Rudolph Gift Bag

There is so much creativity around me, I had to share this cleverly wrapped gift my sister made recently also.

image

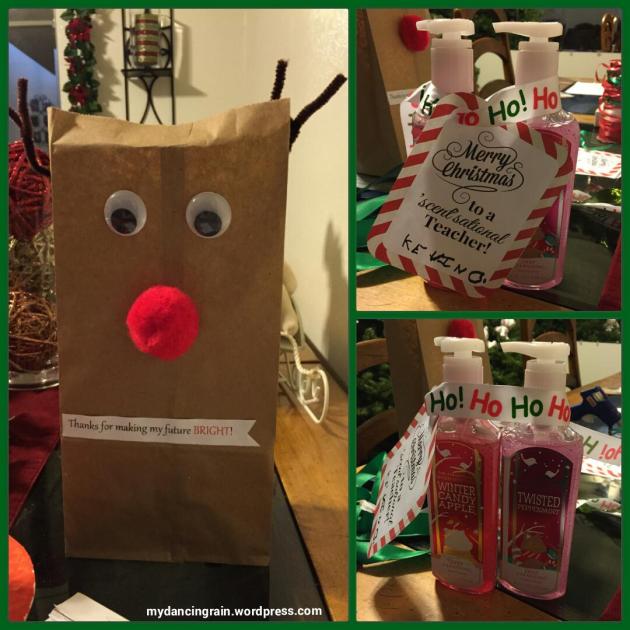
The Rudolph gift bag is a great wrapping idea on its own. Kids of all ages would love receiving this! It is a great option for giving money or gift cards. Or have your kids help make it to give a present to family or friends!

All it takes is some basic crafting supplies. Grab a brown lunch bag, some googly eyes, a red pom pom, brown pipe cleaners and you got yourself a Rudolph! Don’t have a red pom pom, a black pom pom would work just as well to make a generic reindeer gift bag.

She made this for my nephew’s teacher so she added a printed note to the bag that says, “Thanks for making my future bright!” Inside was holiday-scented handsoap tied with Christmas ribbon and a printed note that my nephew hand signed. I had seen this on Pinterest and am glad to see she made it!

1 Comment »

Last minute gift idea for teachers, mail carriers, barbers, babysitters, anyone!

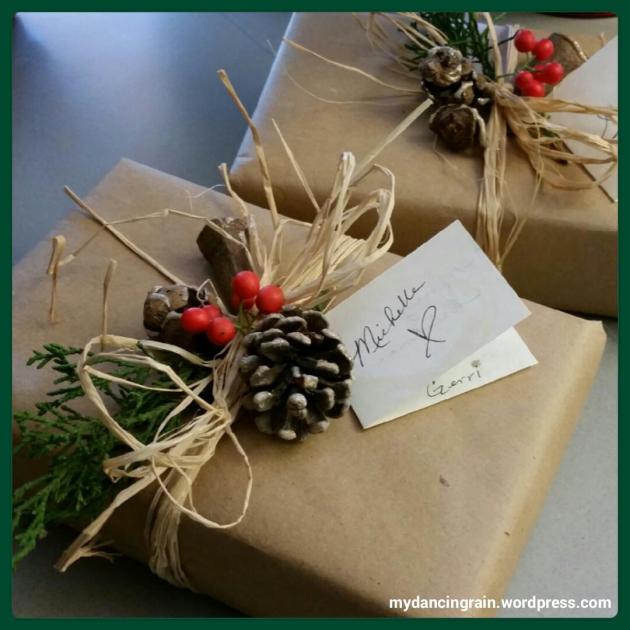
This low-cost DIY gift was made by my super creative and crafty aunt Gerri (a love of crafting runs in the family!) for her Jazzercise instructors. She isn’t even on Pinterest or any other social media site to borrow other peoples’ ideas. Her innate creativity is inspiring!

image

Each box contains 10 hot cocoa packets and a note saying, “A Christmas delight for a cold winter’s night!” She wrapped each box in brown bag paper, tied with raffia ribbon and decorated with a pine sprig, holly berries and pinecone. Very cute and a simple, last-minute DIY gift idea!

Leave a comment »

Hanging Ornaments Out of Kids’ Reach

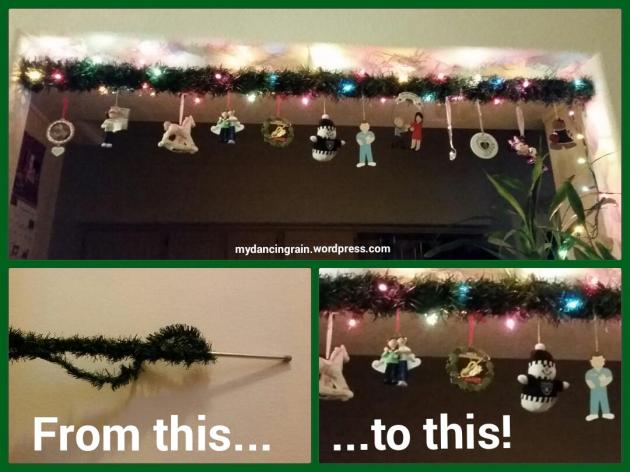
As we go toddler-friendly on our Christmas decorations this year, l wanted a way to display my ornaments that were out of a toddler’s reach. I saw this idea on Pinterest, of course, and decided to give it a try this year.

image

To make it, I wrapped two strands of dollar store garland and one strand of multi-color lights around an inexpensive tension rod. Then I decorated with a selection of ornaments that I really wanted to display this year. If you choose to use lights on yours, just make sure you have an outlet nearby that the little ones can’t access. Luckily my kitchen pass-through window worked well for this!

I am so glad I found this idea. It only took about 30 minutes to make. And I am loving how it adds to my Christmas decor… far away from my daughter’s grabbing hands. Merry Christmas!

Leave a comment »

What to Do With All Those Christmas Cards

image

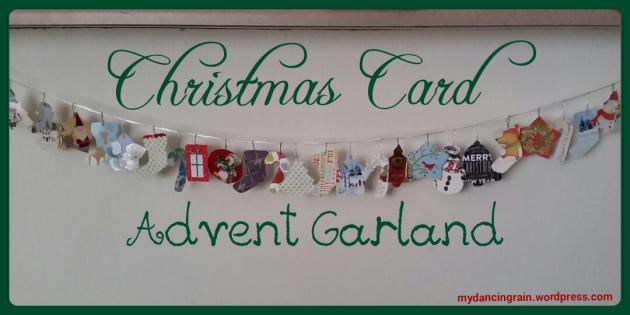
As you start to receive holiday cards from friends and family, you can start thinking about what to do with those cards next year. Don’t toss them; reuse them to make a garland!

This is very easy to make and took about an hour from start to finish.

Here’s how:

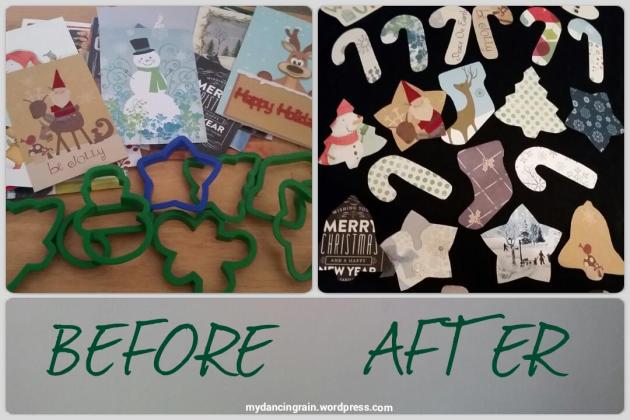
1. Gather all your old cards and sort through them to find cards with festive patterns and scenes. I chose not to use photo cards, but you could use them too.

2. Use stencils of Christmas shapes, such as a tree, gingerbread man and woman, stocking, snowman, candy cane, bell and star. I used cookie cutters for my shapes.

3. Trace your stencils onto the cards. Make sure to include insides and backs of cards, as those usually have nice patterns to balance out your designs.
image

4. After you trace, cut out your shapes. This was the most time consuming step for me. But just put on some Christmas music and the time will fly by!

5. Next, string a ribbon where you plan to display your garland.

6. Attach ornament hooks to your shapes.

7. Hang the shapes from the ribbon variating the shapes as you go.

8. (Optional) I added an advent bible verse series to the back of each shape. To do this, I suggest printing out the verses and cutting and taping them to the back because some shapes may have a design on the back already and you wouldn’t be able to see the verse if written.

If you are starting on this later in the season, or if you don’t have that many cutouts, you can also do a variation for the 12 days of Christmas instead of the 24 days of advent.

Either way, it becomes a lovely DIY home decoration that also creates a new way to admire the beautiful cards from your family and friends!
1 Comment »

“Money Tree” Gift Idea for Adults

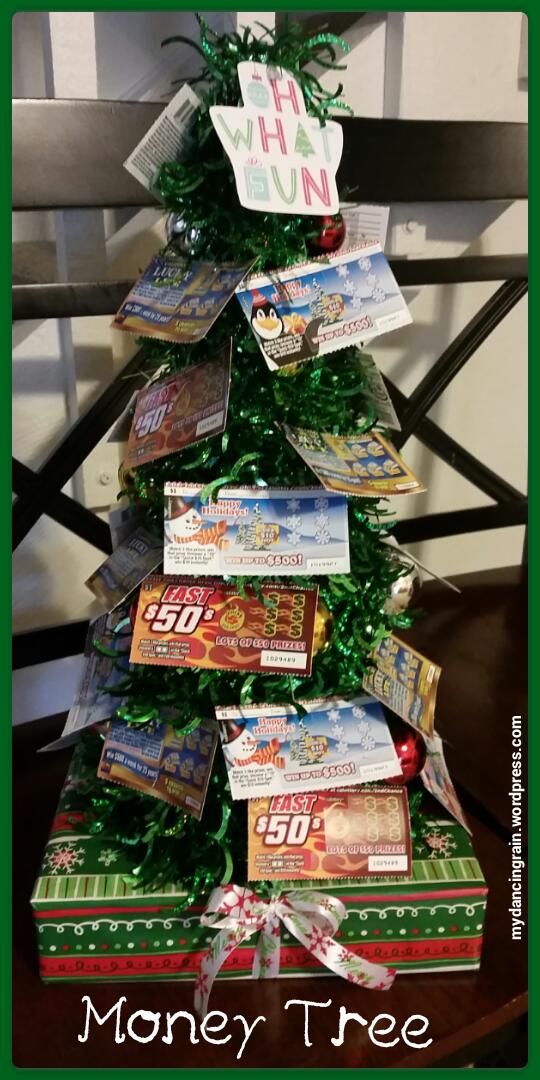
Who says money doesn’t grow on trees? It does when you give someone a lotto tree! This is the perfect gift for that person on your list who always dreams of winning the lottery, or that hard-to-please person who has everything. Maybe they will win a little, maybe not. The fun part will be scratching off each ticket!

image

I made this for my dad as a non-traditional advent gift, so he could scratch off a ticket each day of December leading up to Christmas. The tree is an inexpensive pre-made tree with a hard plastic frame that I found at a hardware store. I got 24 $1 scratchers and taped ornament hooks to the back of each ticket to hang them from the tree. Very simple!

I wrapped his actual present and used it as a base under the tree, using ribbon for tying the tree to the box. (Personally, I felt like I had to add a little present just in case he didn’t win anything, but it’s probably not necessary for everyone.) My dad was surprised to see all the scratchers and was even excited to use the tree as a little holiday decoration for his man-cave!

3 Comments »

Advent Candle Craft for Kids

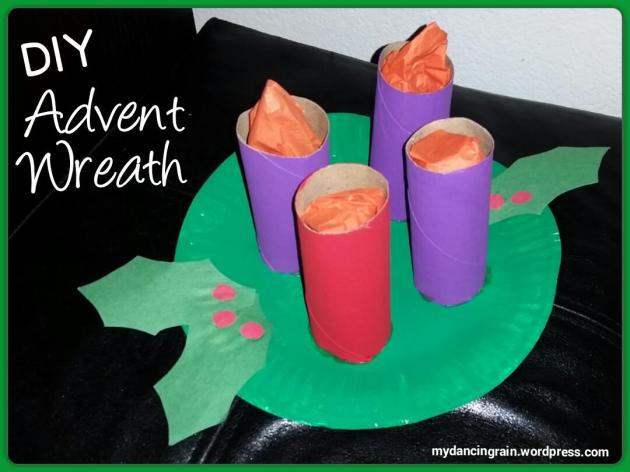
Save a few toilet paper rolls for this one! Your kiddos will have fun painting the plate and toilet paper rolls to make this festive — and fire-less — advent wreath. We used orange tissue paper for the flames; just roll a strip into a point and place it in the roll. Hide the tissue paper until it’s time to “light” that week’s candle.

image

We finished off the project with some cut out green holly leaves and red berries. Glue all items to the plate using white glue and let dry overnight. Makes a nice little decoration for advent! And is a great way to get kids involved in advent season activities!

Leave a comment »