Dancing Rain

My Life Inspired by My Loves

Every Princess Needs a Dress-up Closet

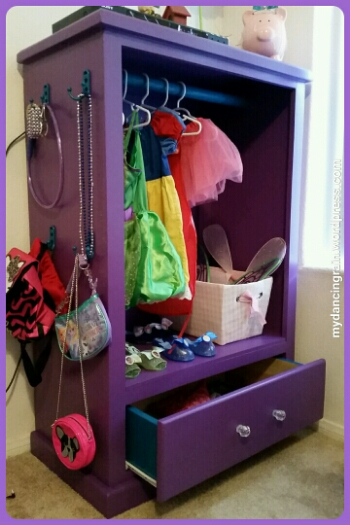
Where else do you put all those dresses, tutus, shoes, necklaces and tiaras?

image

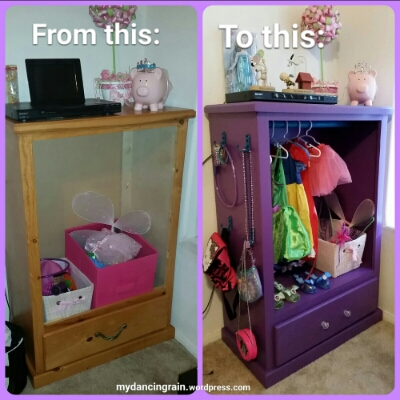
Princess dress-up closet made from an old dresser

What I love best about this is that this closet was made by up-cycling my old raggedy dresser. My husband got rid of the broken drawers and hinges, missing handles and saved the dresser from the dumpster. With a little paint and new hardware, he transformed it into an adorable piece of furniture perfect for organizing my daughter’s dress-up clothes and accessories in her play room!

image

Princess dress-up closet made from an old dresser

1 Comment »

Organize Those Hair Clips and Bows

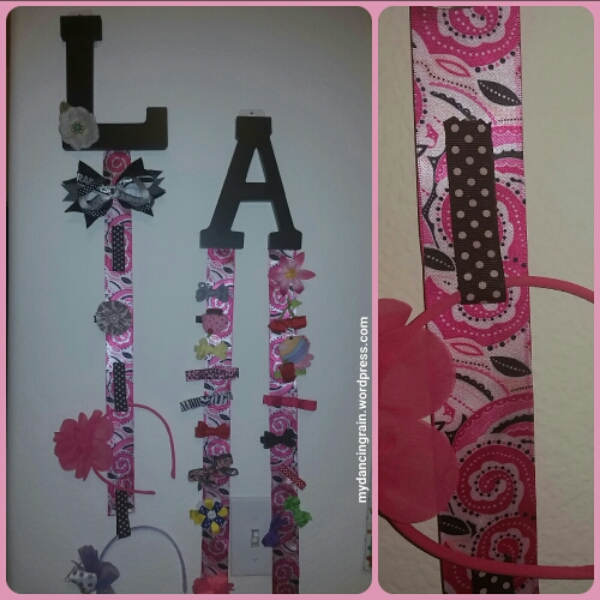
Our hairbow collection was overflowing and needed a nice display. My sister made the “L” for my daughter and it quickly filled up. She had so many bows and hair clips that I added the “A” with leftover ribbon my sister had. All it takes are some wooden letters from your craft store, ribbon and a glue gun. Add a couple small nails to the wall and voila!

Best part is my daughter now gets to admire all her bows and likes to pick out which one to wear!

image

If you want to incorporate a headband holder as pictured on the right above, just grab a smaller contrasting ribbon, loop it and glue to the larger ribbon. Do this as many times as needed for your headbands. You can also make your large ribbon double-sided for extra durability. Just double your ribbon length, fold it in half and use your glue gun to glue the pieces together.

Leave a comment »

When Dinner Planning Gets Organized…

The result is better dinners and a happier mama! And a happier and healthier family too!

I am super organized and always hated the idea of thinking up what to make for dinner, let alone actually cooking it. I had no idea those two things could be related, but when I happened to stumble upon menu boards on Pinterest everything I thought I knew about making dinner changed!

I had frequently collected recipes in magazines, ads and even on Pinterest. But I had a hard time getting to the point of making those recipes. I decided to make a menu board as a potential way to help me organize my dinner ideas and maybe actually might lead to making some new meals. What I discovered was that not only was I trying new recipes, but I also became a better and more thrifty grocery shopper. And (a BIG and) I was actually getting excited about dinner time! At the end of the work day, I would look forward to making dinner! Talk about a complete 180!

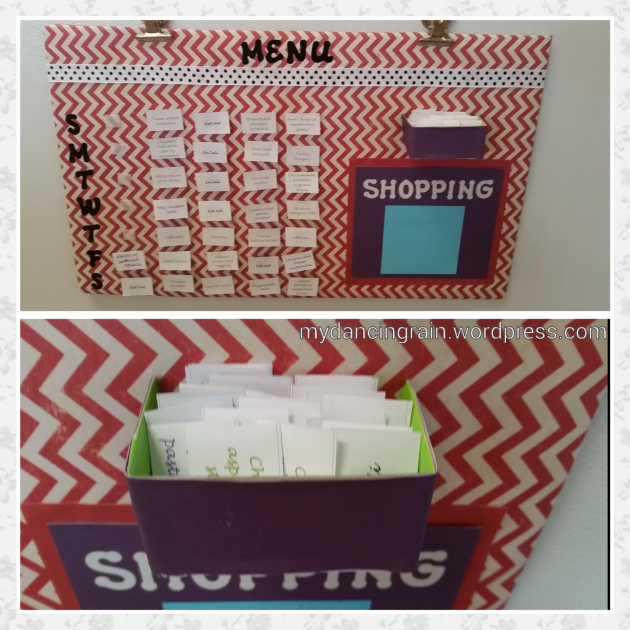
My menu board is a compilation of different ideas I found on Pinterest. After browsing through various menu boards and thinking about how my mind works, I decided on this. I wanted to be able to see my options all at once and to be able to swap things easily (because let’s face it, plans change and tastes change).
image

To make this, I used a side of a cardboard diaper box, covered it in scrapbook paper and then added sticker letters for the title and even added a spot for a shopping list. I used velcro for the meal ideas so I could easily move them around. I also added a small cardboard box, covered in paper as well. This would hold my extra meal idea tags.

To create the meal idea tags, I went through all my meal ideas I’ve collected over time and narrowed the choices down to what I considered doable, based on time involved (most 30-45 minutes or less), complexity (because I am a novice) and ingredients (using staples that I usually have or buy). Then I typed out each one, printed the sheet and cut them apart using my paper cutter. I color-coded my tags to distinguish the not-so-healthy meals so that I could make sure not to have too many in the same week or month.

As I said, the result has been more than I could have imagined! This is a huge help in my household, to avoid the daily struggle of deciding what to make and to help make sure I have what I need when I need it. I highly recommend it.

Soon I will share some of my favorite dishes!
2 Comments »

DIY Lei for Kids

image

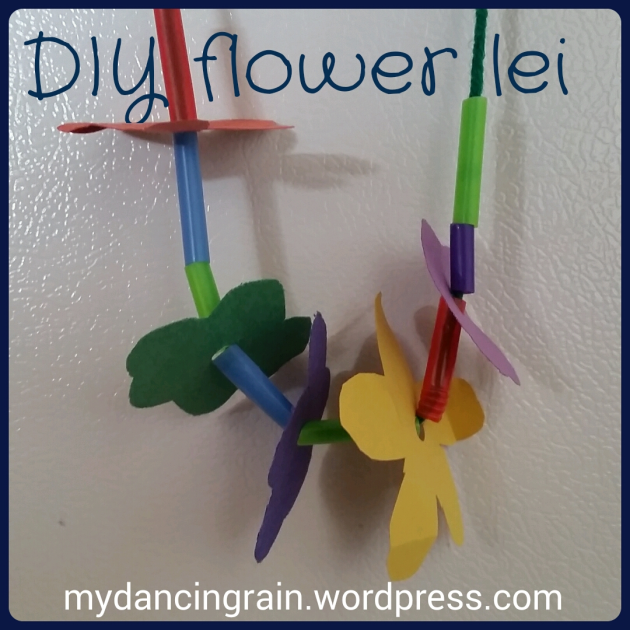
This is a great summer craft for the kids and nearly mess-free! Would be a great kid-friendly activity for a summer luau, pool party or family BBQ. My daughter made this at her daycare for a luau-themed party.

All you need are some colorful plastic straws cut into 1-inch pieces, green (or any color!) yarn cut to fit your child’s neck and colorful paper cut into flowers. If your kids are able, they could do the cutting as part of the craft.

Leave a comment »

DIY “Halle-Luau” Teacher Gift

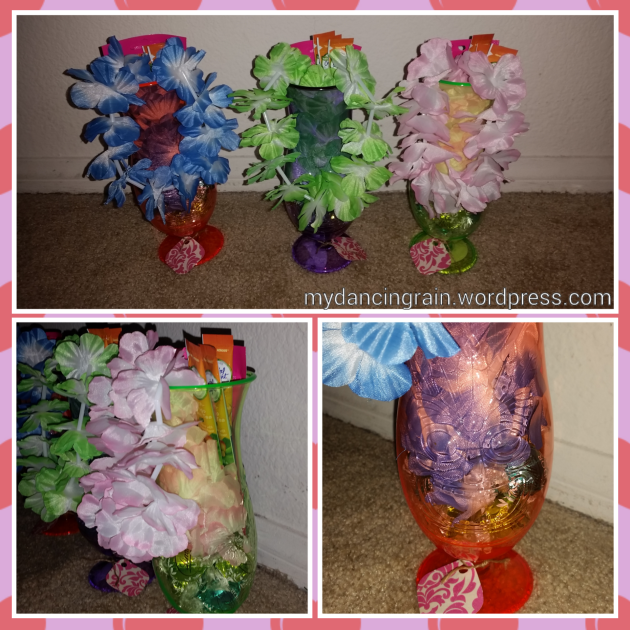
Check out this cute idea for a luau or Hawaiian themed gift to mark the end of summer! The card reads: “Halle-luau for wonderful teachers like you!”

image

This is a simple dollar store gift, using a colorful cup, lei, coconut or tropical flavored candy, and lemonade flavor packets.

Leave a comment »

Happy 30th Birthday Bucket Gift Ideas

Following my recent post about a 40th birthday gift basket, I also have a couple variations for 30th birthdays! They say 30 is the new 20, so these gift buckets focus on fun and celeration! They would be great for 21st or 25th birthdays as well.

Party Girl Birthday Bucket
image

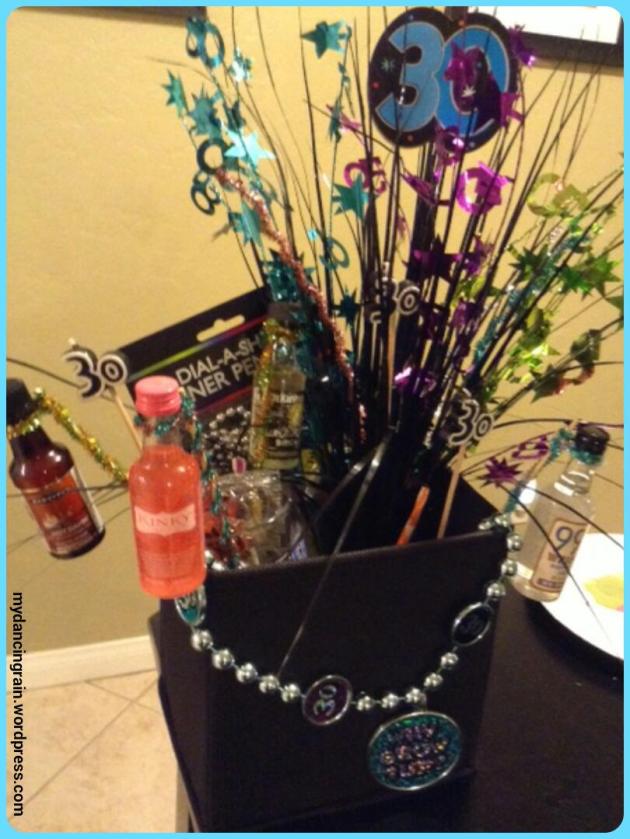
This gift bucket is simple to make, just requires gathering the items you need and about 20 minutes of assembly. You can find mini liquor bottles at most liquor stores. Get a good mix based on flavors the birthday celebrant likes, name of the liquor (some are called Kinky, Cake, etc.), and colors you want for your basket. Wrap some colored pipe cleaners around the top of each liquor bottle and attach it to a sturdy popsicle stick, skewer stick or dowel rod by continuing to wrap the pipe cleaner. From the party supply store (or online printables), place a big “30” on another dowel rod or large popsicle stick. For this I used a store-bought “30” centerpiece. To hold everything in place in your bucket, throw in some candy and any other goodies. I added a “30” pint glass, dial-a-shot game and “30” candles from the party store. Finish it with some beads decorated around the top of the bucket!

30 Ways to Celebrate Bucket
image

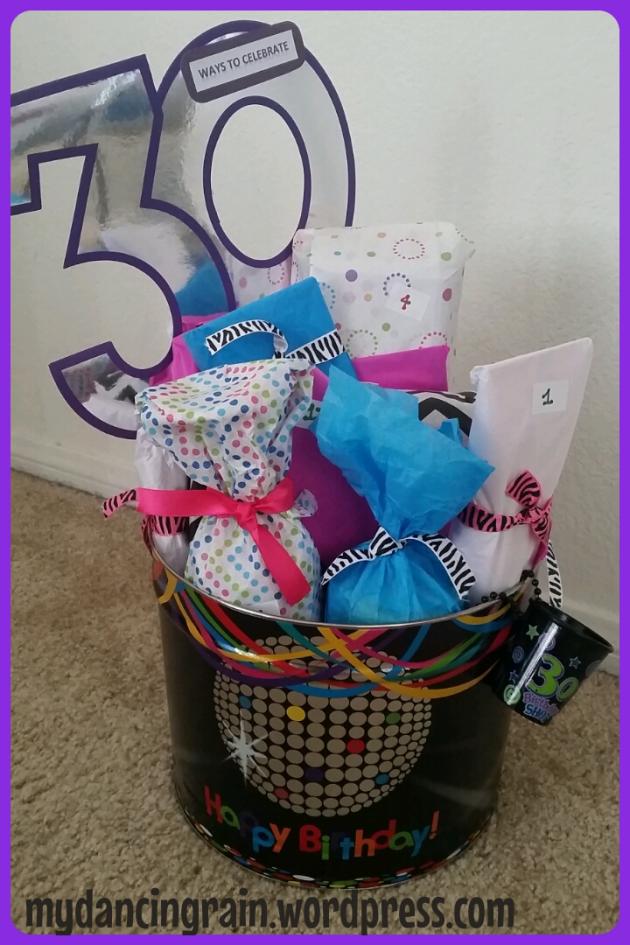
I made this bucket for my little sister’s 30th as a partly celebratory and partly sentimental gift. It included things for her now and things that we used to like growing up.

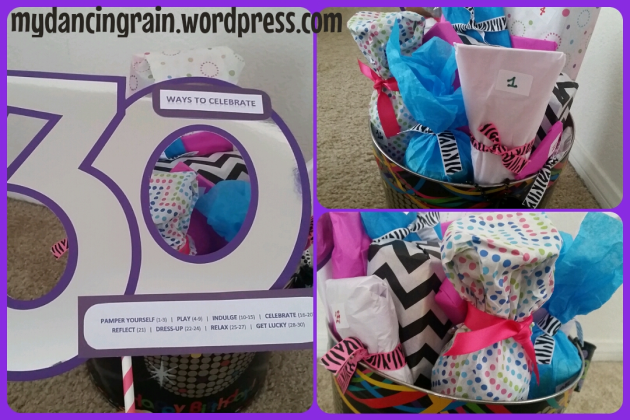
The theme is “30 Ways to Celebrate” and included 30 gifts grouped together in several categories:

  • Pamper Yourself (1-3: facial masque, scented lotion and body wash)
  • Play (4-9: puzzle, iTunes gift card, beach ball, poppers, Barbie, princess autograph book for Disneyland)
  • Indulge (10-15: popcorn and candy)
  • Celebrate (16-20: silly string, sparklers, wine glass, wine bottle, beer bottle)
  • Reflect (21: a list of 30 of my favorite sister memories we shared)
  • Dress Up (22-24: jewelry)
  • Relax (25-27: pajama set and candle)
  • Get Lucky (28-30: lotto tickets)

image

For the bucket I re-used a Popcorn Factory bucket that was given to me and that I kept because it screams party! I wrapped each item in coordinating patterned and solid color tissue paper and tied ribbons on many. I used mailing labels for the numbers. Finish it off with a couple “30” items from the party store, including a beaded shot glass necklace and a cut-out for the backdrop, which I taped to a festive straw to stick in the bucket. I printed the “Ways to Celebrate” and description on my printer, taped them to purple paper backings and taped them to the “30” cut-out. As you can imagine, not everything fit in my cute birthday bucket so I used a separate gift bag for overflow items. Not a big deal and it still looked great!

Leave a comment »

“Celebrate 40” Birthday Gift Basket

image

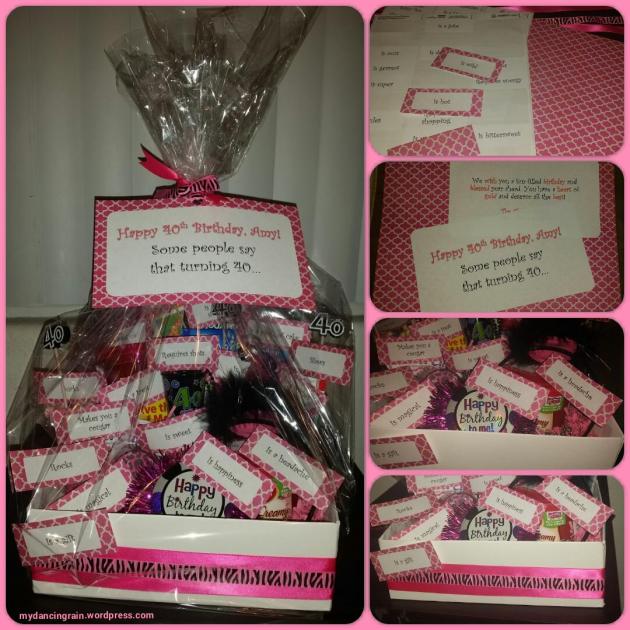
I am a fan of making gift baskets for milestone birthdays. For a friend’s 40th, I put together this gift basket.

The theme is based off the phrase “Some people say turning 40…” and each of the 40 items in the box follow this phrase:
…is wild
…is a gift
…makes you a cougar
…is magical
…is hot
…calls for a drink
…is spicy
…is happiness
…is a headache
…is great
…is crazy
…rocks
…sucks
…requires bling
…requires shots
…and so on… use your imagination to make your basket items fit the theme!

I recommend printing each phrase on mailing labels so you can easily stick them on to the paper backings. For the basket/box, I glue-gunned some coordinating ribbon around a plain white box. Carefully place the items in the box, taping things down if needed to prevent movement. Then use cellophane and more ribbon to wrap it up. You could skip the cello wrap, but I was bringing this gift to a party and didn’t want things to go missing.

1 Comment »

School Spirit Grad Gift Idea

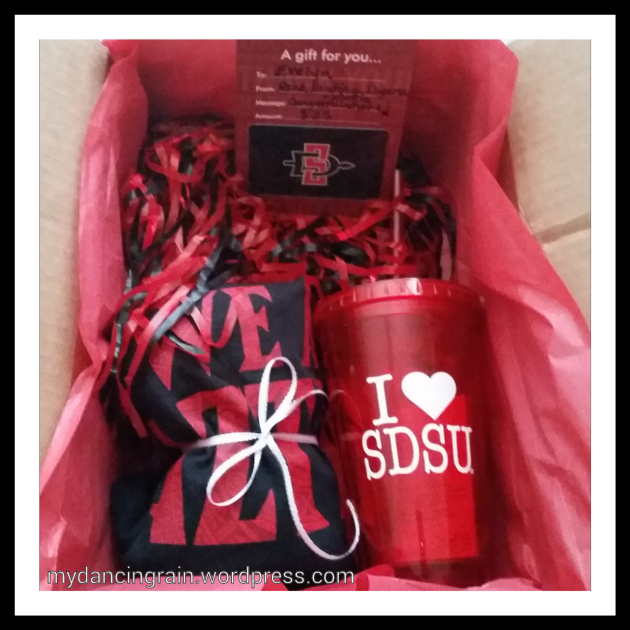
Celebrate your high school graduate with a fun gift to help them show pride for their future college! For this gift, I included a pom pom, water cup, spirit shirt and bookstore gift card. Shout-out to my alma mater, San Diego State University!

This would also make a good care package for a college student or gift for a college sports fanatic.

image

Leave a comment »

Colorful Topiaries Make Great Centerpieces

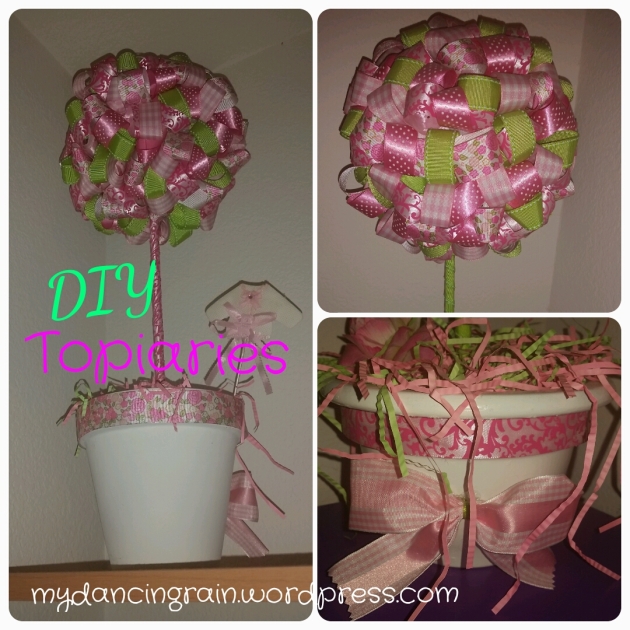
Decorate your home or office with this adorable topiary made of colorful ribbon. Also makes a great party centerpiece! The best part is you can reuse this idea for any season or party theme – just swap out the ribbon color to match what you need!

Credit for these goes to my sister who made these topiaries for my baby shower. I loved them at the party and now use them to decorate my daughter’s room!

image

What You Need:
Small flower pot
Medium Styrofoam ball
Small Styrofoam ball
Dowel rod
Ribbon, assorted colors and patterns
Pins
Glue gun
Colorful Easter grass or shredded paper
Paint, for the vase (optional)
Modeling clay (optional)

What to Do
1. Paint the vase if you aren’t able to find one in the desired color. Let it dry.

2. Cut ribbon into 4 inch strips.

3. Fold ribbon strip in half and pin to the medium Styrofoam ball. Repeat until the ball is covered.

4. Insert one end of the dowel rod into the large Styrofoam ball and the other end into the small Styrofoam ball.

5. Place the small Styrofoam ball into the flower pot.

6. Decorate the pot with a strip of ribbon around the top and perhaps a bow. Use glue gun to secure ribbon to the flower pot.

7. Optional: Add modeling clay around the small Styrofoam ball to prevent movement in the flower pot. (I highly recommend this, but it’s not crucial. Just be gentle with the pot if you skip it.)

8. Drop in the Easter grass or shredded paper to cover the inside of the pot.

There you have it! Make as many as you need to create a festive look in your home, office or at your next party!

1 Comment »

Alphabet Scavenger Hunt Great for Summer!

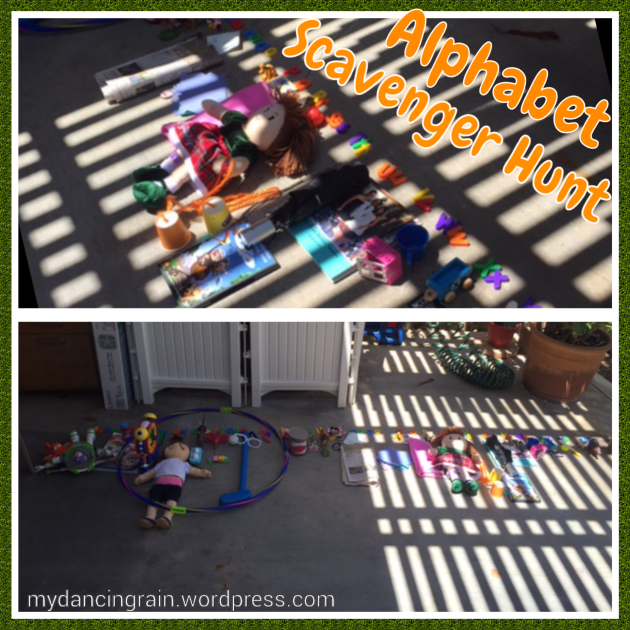
Keep the kiddos learning this summer with a fun activity to help them practice their ABCs. This A to Z scavenger hunt can be done indoors or outdoors or both! My sister and my nephew used the fridge magnet letters to help organize their findings.

image

Leave a comment »